#3 Microsoft Office Feature
⭐
Julie Chaumard lesson
What is Microsoft Office ?
- A program is a set of instructions that a computer uses to accomplish a task. An application is a computer program that performs a task for a specific purpose. The term desktop application or desktop app refers to a computer program that is installed on your PC and that requires a computer operating system such as Microsoft Windows or macOS to run.
- The programs in Microsoft Office 365—referred to now as simply Microsoft 365—are considered to be desktop apps. A desktop app typically has hundreds of features and takes time to learn.
Alternatives
- Open Source and free
- LibreOffice
- Google Workspace
- Apple iWork
❓
Find alternative office/productivity suite
What is an operating system ?
An operating system is a specific type of computer program that manages the other programs on a computing device such as a desktop or laptop computer, a smartphone, a tablet computer, or a game console.
What is use for ?
What are the different types and providers of OS ?
Features of MS Office across all apps
🧭
Train with the exercice : 🎲W1 - Office features
Mainwhile displaying this lesson at the board of the classroom the student to the related exercises to practices the lesson
- Backspace key removes character to the left of the insertion point
- Delete key removes characyer to the right of the insertion point
- Mini tool bar when you select some text
- Page shading : Design menu / Page color / File effects
- Save as : to organize your file
- Footer to the document with the file name
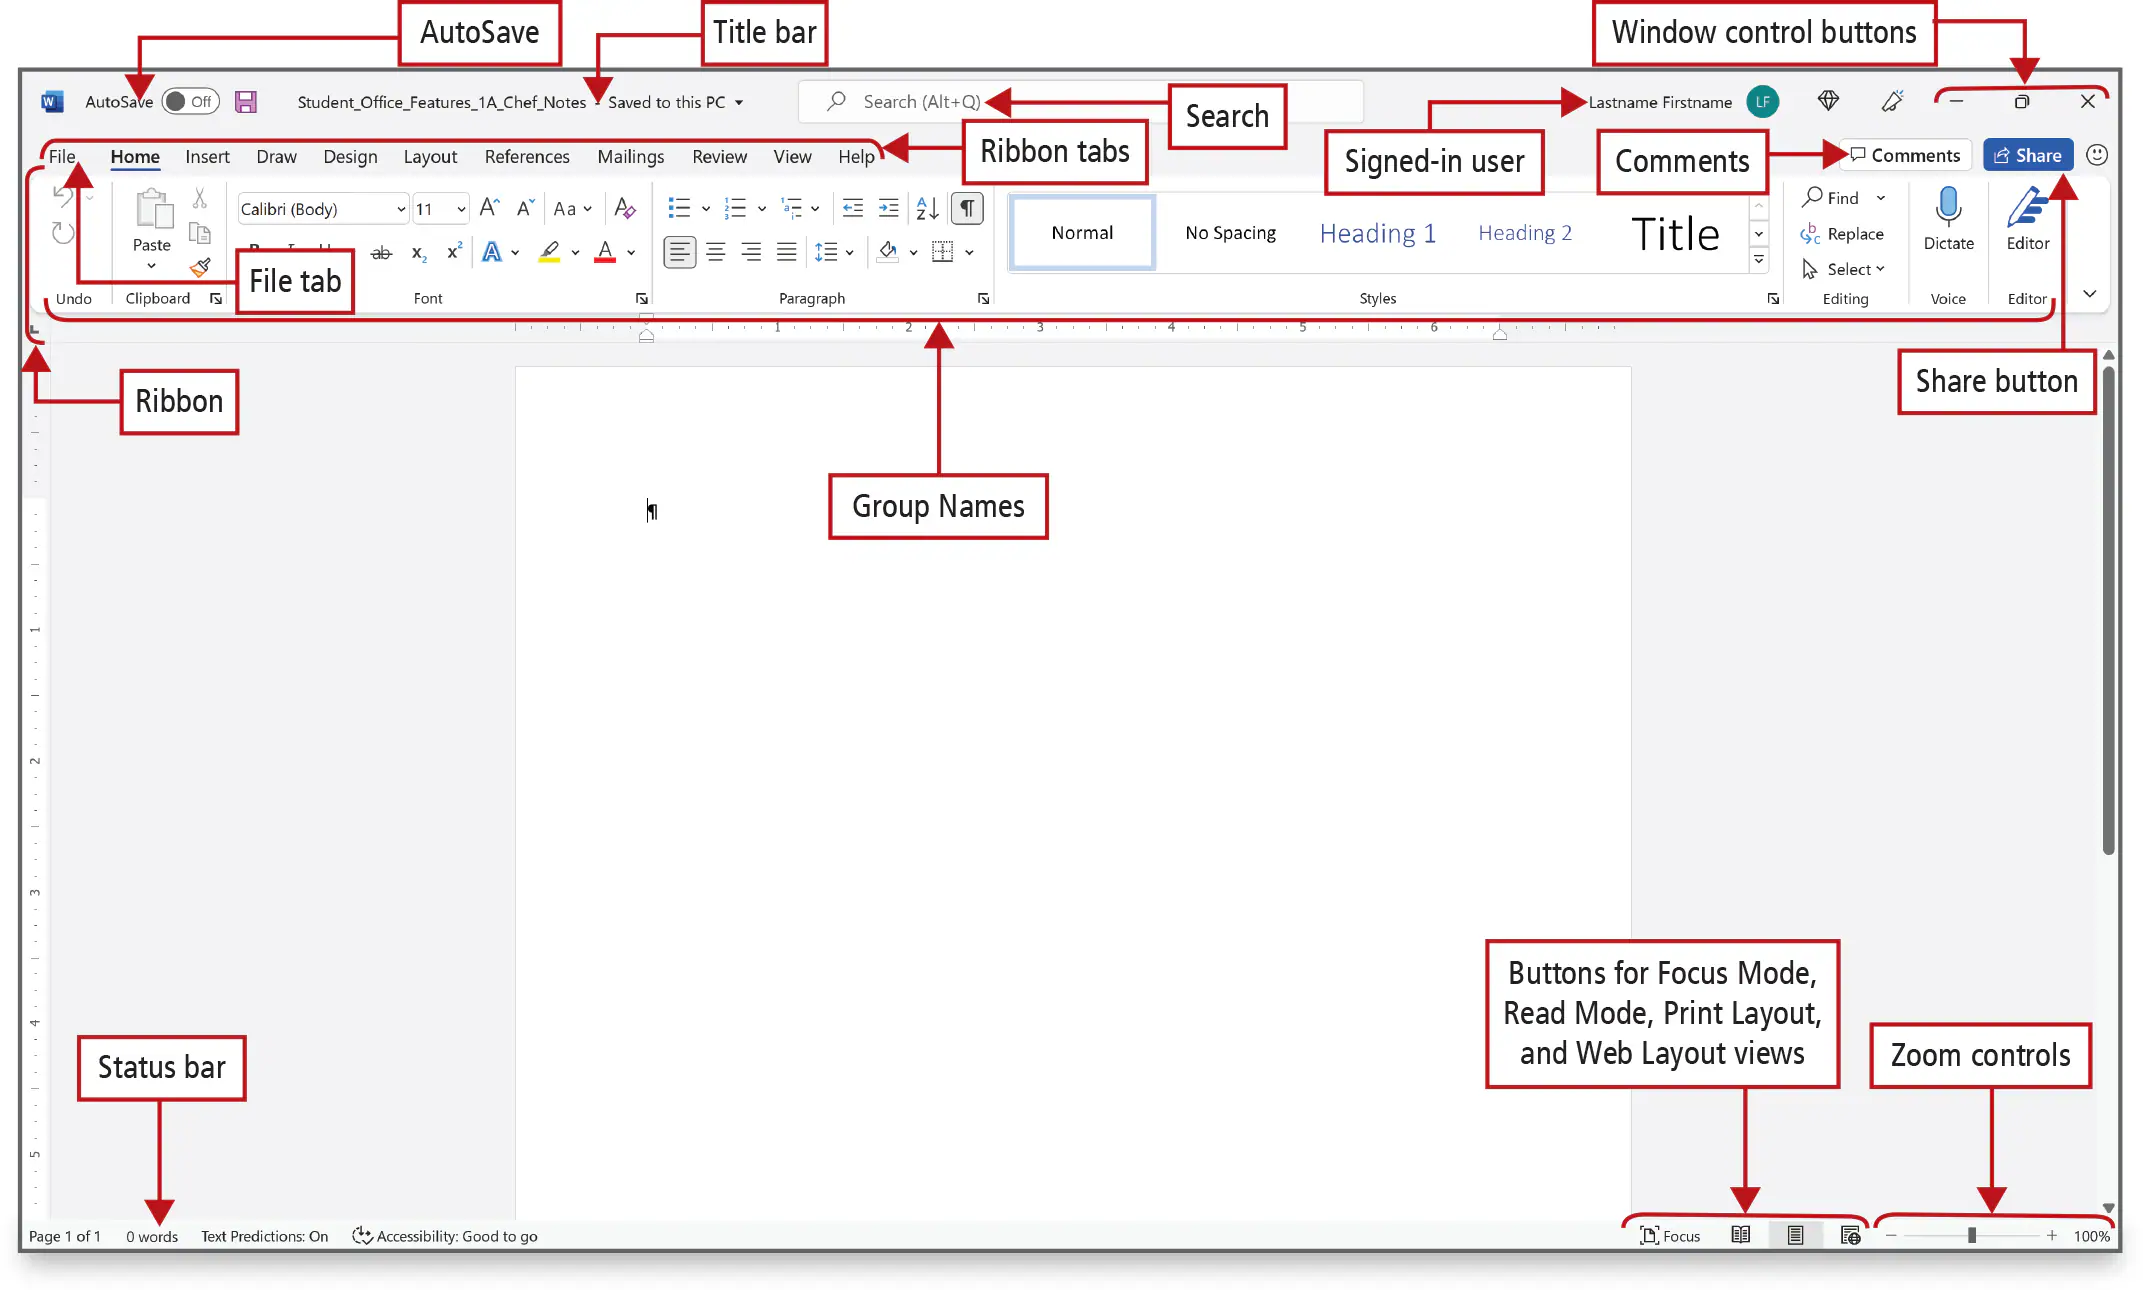
- Home tab :
- is a centralized space for all your file management tasks such as opening, saving, printing, publishing, or sharing a file—all the things you can do with a file.
- In the center of the screen, documents that you have recently opened, if any, display under the Recent tab. You can also click the Pinned tab to see documents you have pinned there, or you can click the Shared with Me tab to see documents that have been shared with you by others.
- Use a template for your document.
- Ribbon options : On the right end of the ribbon, click the Ribbon Display Options arrow
Editing text
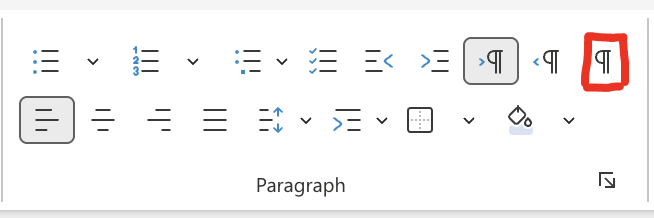
- Home tab : Show/hide the invisible mark
- View tab : Rulers
- When working in Word, display the rulers so that you can see how margin settings affect your document and how text and objects align. Additionally, if you set a tab stop or an indent, its location is visible on the ruler.
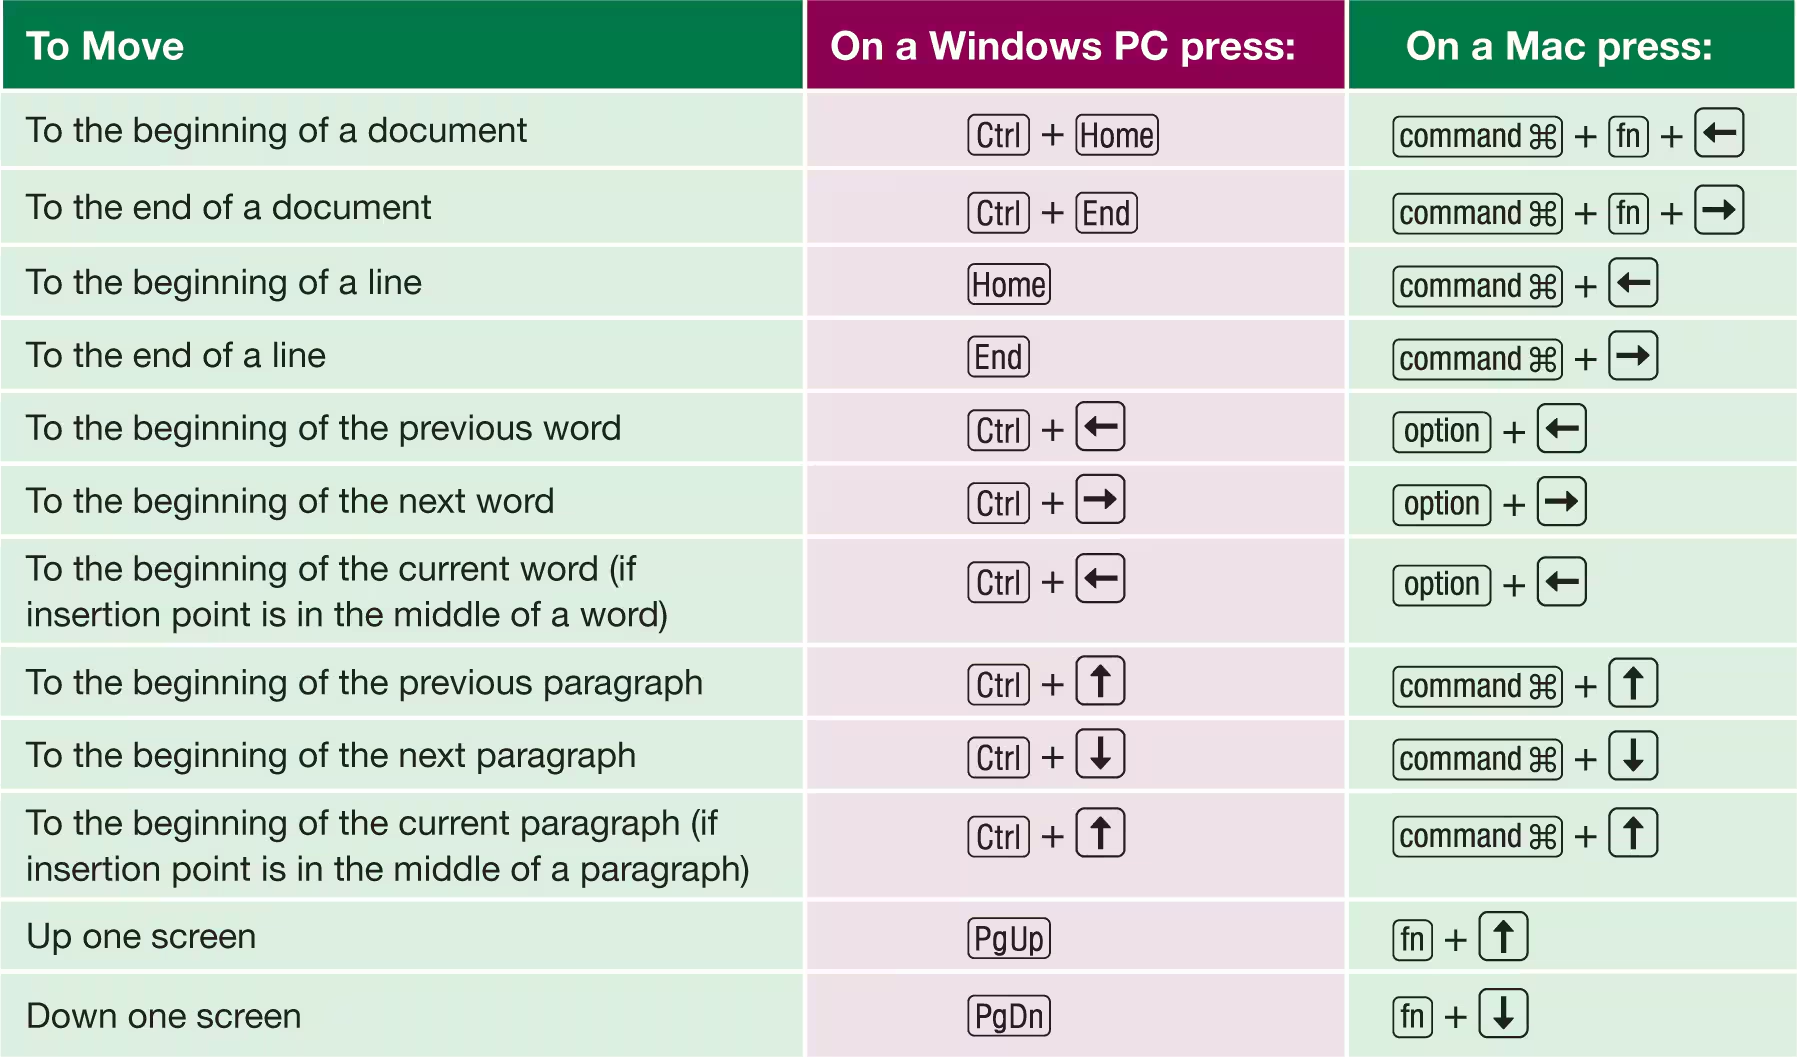
Navigate to the page
- CTRL + ← : move the insertion point to the end of the word
- A triple click on a word select the entire paragraph
Spelling and grammar and editor settings
- A red squiggle, indicating a possible misspelled word, a proper name, or an unusual word. Dotted underscores indicate suggestions for grammar and for writing refinements.
- In Excel and Access, you can initiate a check of the spelling, but red squiggles do not display.
- Select text and in the context menu choose Rewrite Suggestions
Undo
- To undo an action :
- click the Home tab, and then at the left end of the ribbon, in the Undo group, point to the Undo button,
- Press CTRL + Z keyboard shortcup
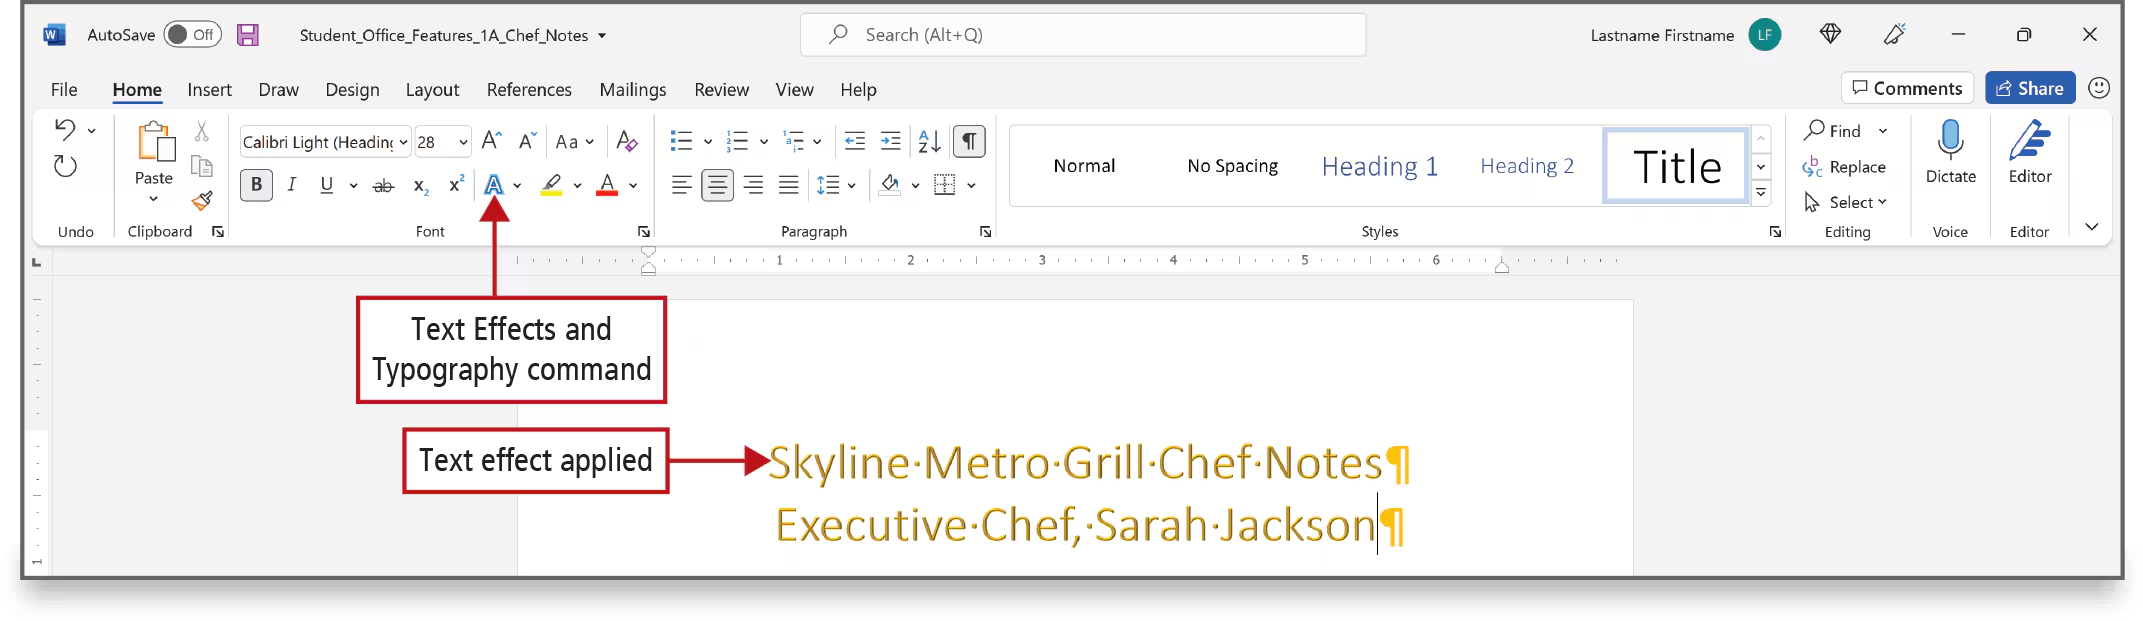
Text effects
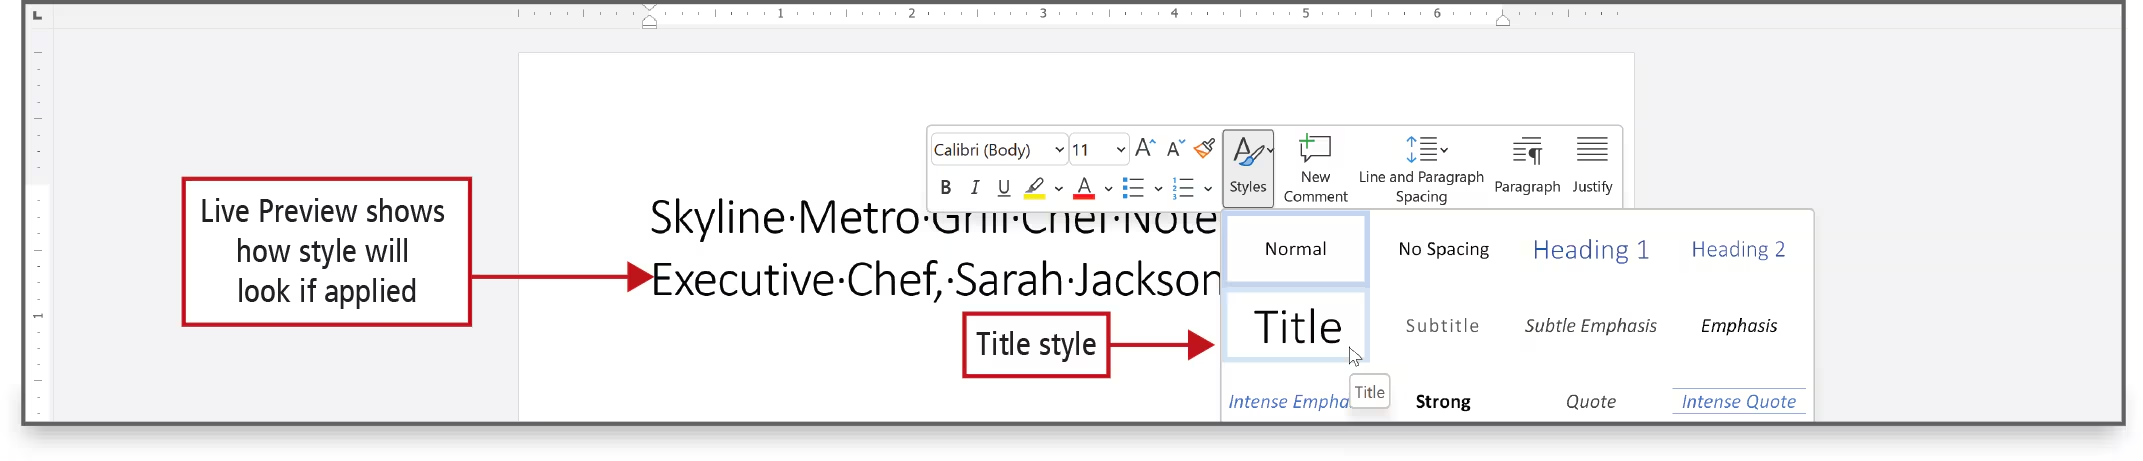
- Styles : in the ribbon or the mini toolbar
- A style is a group of formatting commands, such as font, font size, font color, paragraph alignment, and line spacing that you can apply to a paragraph with one command.
- Live Preview is a technology that shows the result of applying an editing or formatting change as you point to possible results—before you actually apply it.
- Alignment
- Left or right
- Center : Center from the mini toolbar
- Effects and Typography
Picture & contextual tab
- click the Insert tab. In the Illustrations group, point to Pictures to display its ScreenTip
- The picture displays in your Word document, the picture is selected, and the Picture Format tab is active on the ribbon.
- The Picture Format tab is an example of a contextual tab, which is a hidden tab in the Office ribbon that displays in the tab row when a specific event occurs. For example, the Picture Format tab displays only when you select an image and therefore need access to commands related to an image.
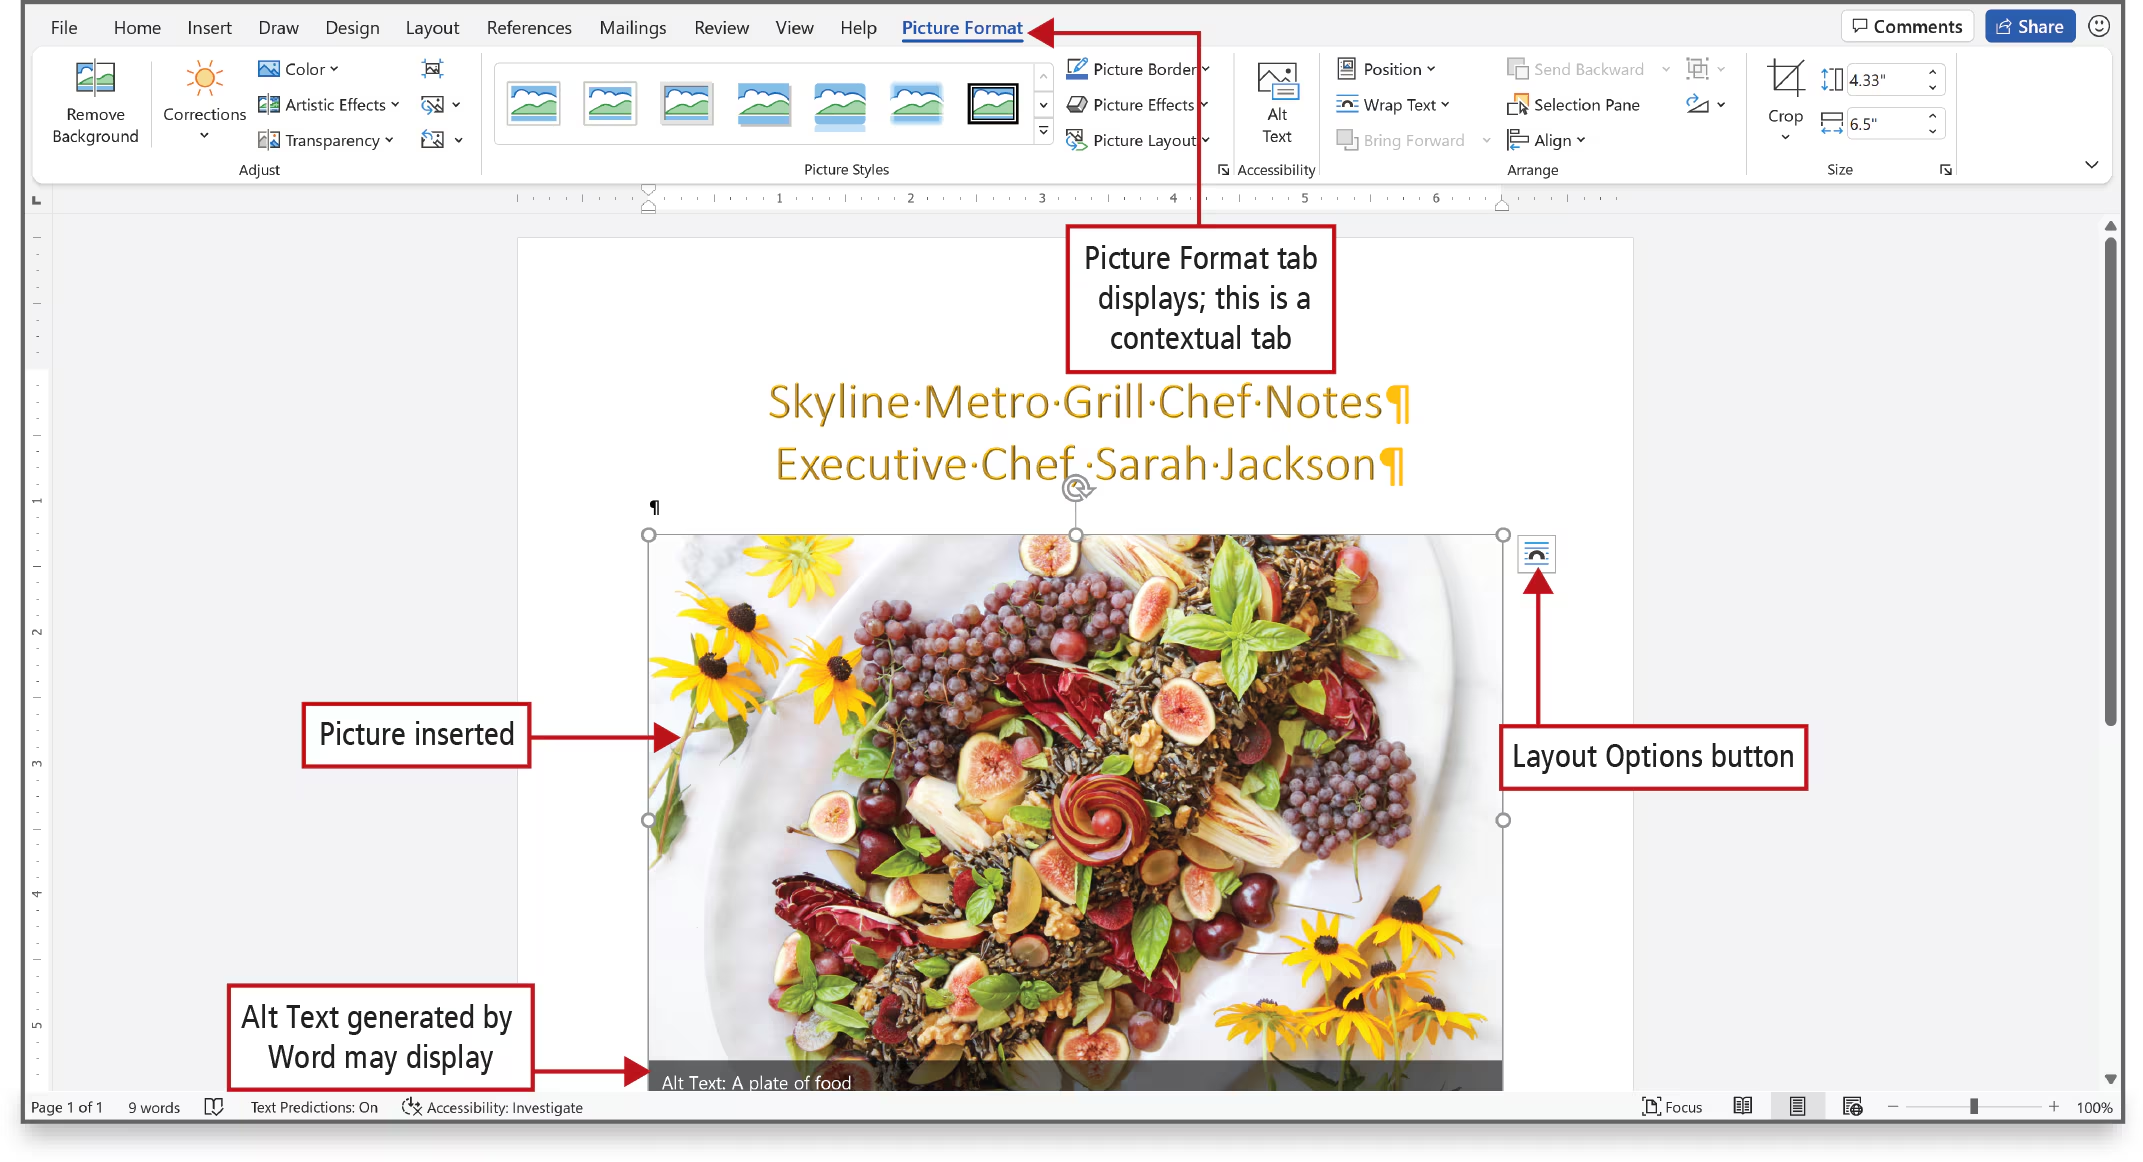
- Layout option : In the upper right corner of the picture, point to the Layout Options button to display its ScreenTip
- Layout Options enable you to choose how the object—in this instance an inserted picture—interacts with the surrounding text. An object is a picture or other graphic such as a chart or table that you can select and then move and resize.
- When a picture is selected, the Picture Format tab on the ribbon displays and enables commands related to pictures or other objects. Additionally, sizing handles—small circles or squares that indicate an object is selected—surround the selected picture.
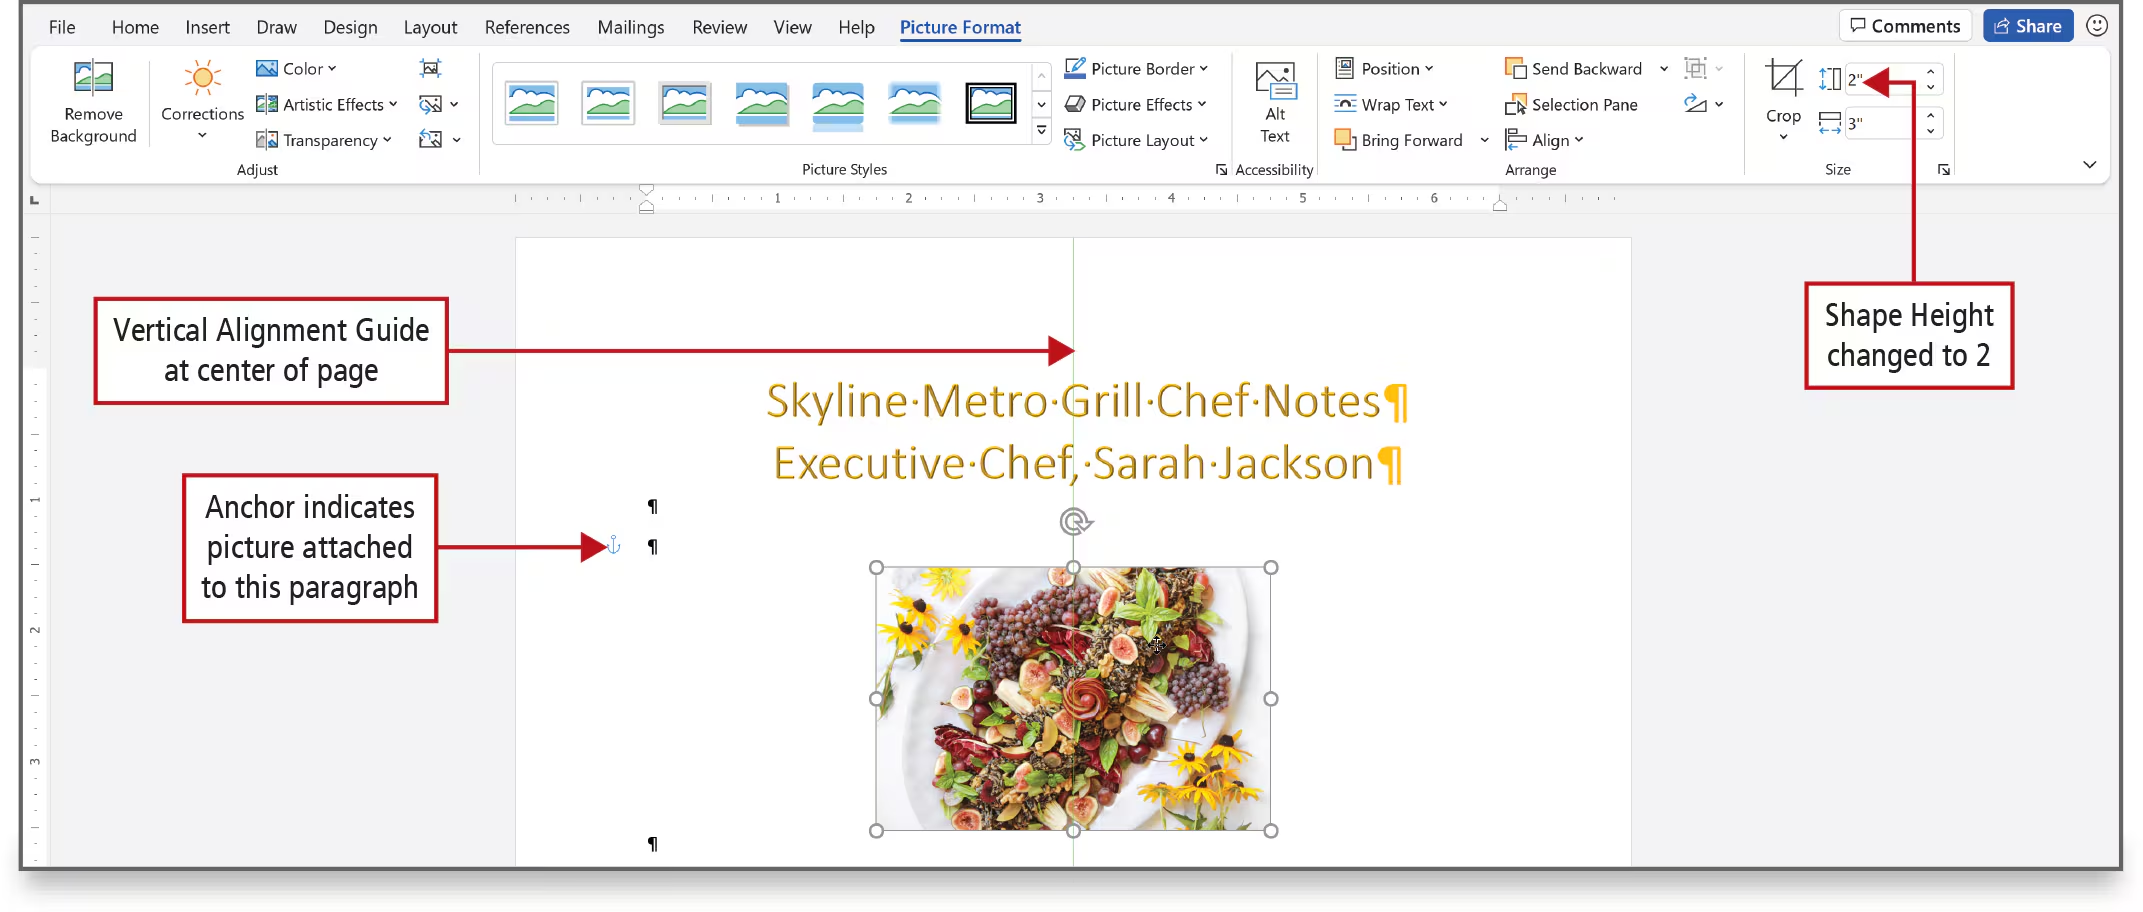
- On the ribbon, on the Picture Format tab, at the right, in the Size group, click in the Shape Height box to select the existing text. Type 2 and press On the Picture Format tab, in the Arrange group, click Align, and then at the bottom of the list, locate Use Alignment Guides. If you do not see a checkmark to the left of Use Alignment Guides, click the command to enable the guides. If necessary, click Align again to dismiss the list.
- If necessary, click the image again to select it. Point to the image to display the pointer, hold down the left mouse button and move your mouse slightly to display a green line at the left margin, and then drag the image to the right and down slightly until a green line displays in the center of the image as shown in Figure 1.20. Release the left mouse button.
- Be sure that there are two blank paragraphs above the image and that the anchor symbol is attached to the second blank paragraph mark—if necessary, drag the picture up slightly or down slightly. If you are not satisfied with your result, press to undo and begin again.
- Alignment guides are green lines that display to help you align objects with margins or at the center of a page.
- Inserted pictures anchor—attach to—the paragraph at the insertion point location—as indicated by an anchor symbol.
- On the ribbon, on the Picture Format tab, in the Picture Styles group, point to the first style to display the ScreenTip Simple Frame, White, and notice that the image displays with a white frame.
- Watch the image as you point to the second picture style, and then to the third, and then to the fourth.
- Recall that Live Preview shows the result of applying an editing or formatting change as you point to possible results—before you actually apply it.
- In the Picture Styles group, click the fourth style—Drop Shadow Rectangle.
- As necessary, drag the picture up or down so that it remains anchored to the second blank paragraph above the image, and then click anywhere outside of the image to deselect it. Notice that the Picture Format tab no longer displays on the ribbon.
- Contextual tabs on the ribbon display only when you need them.

Page Orientation and Zoom Level
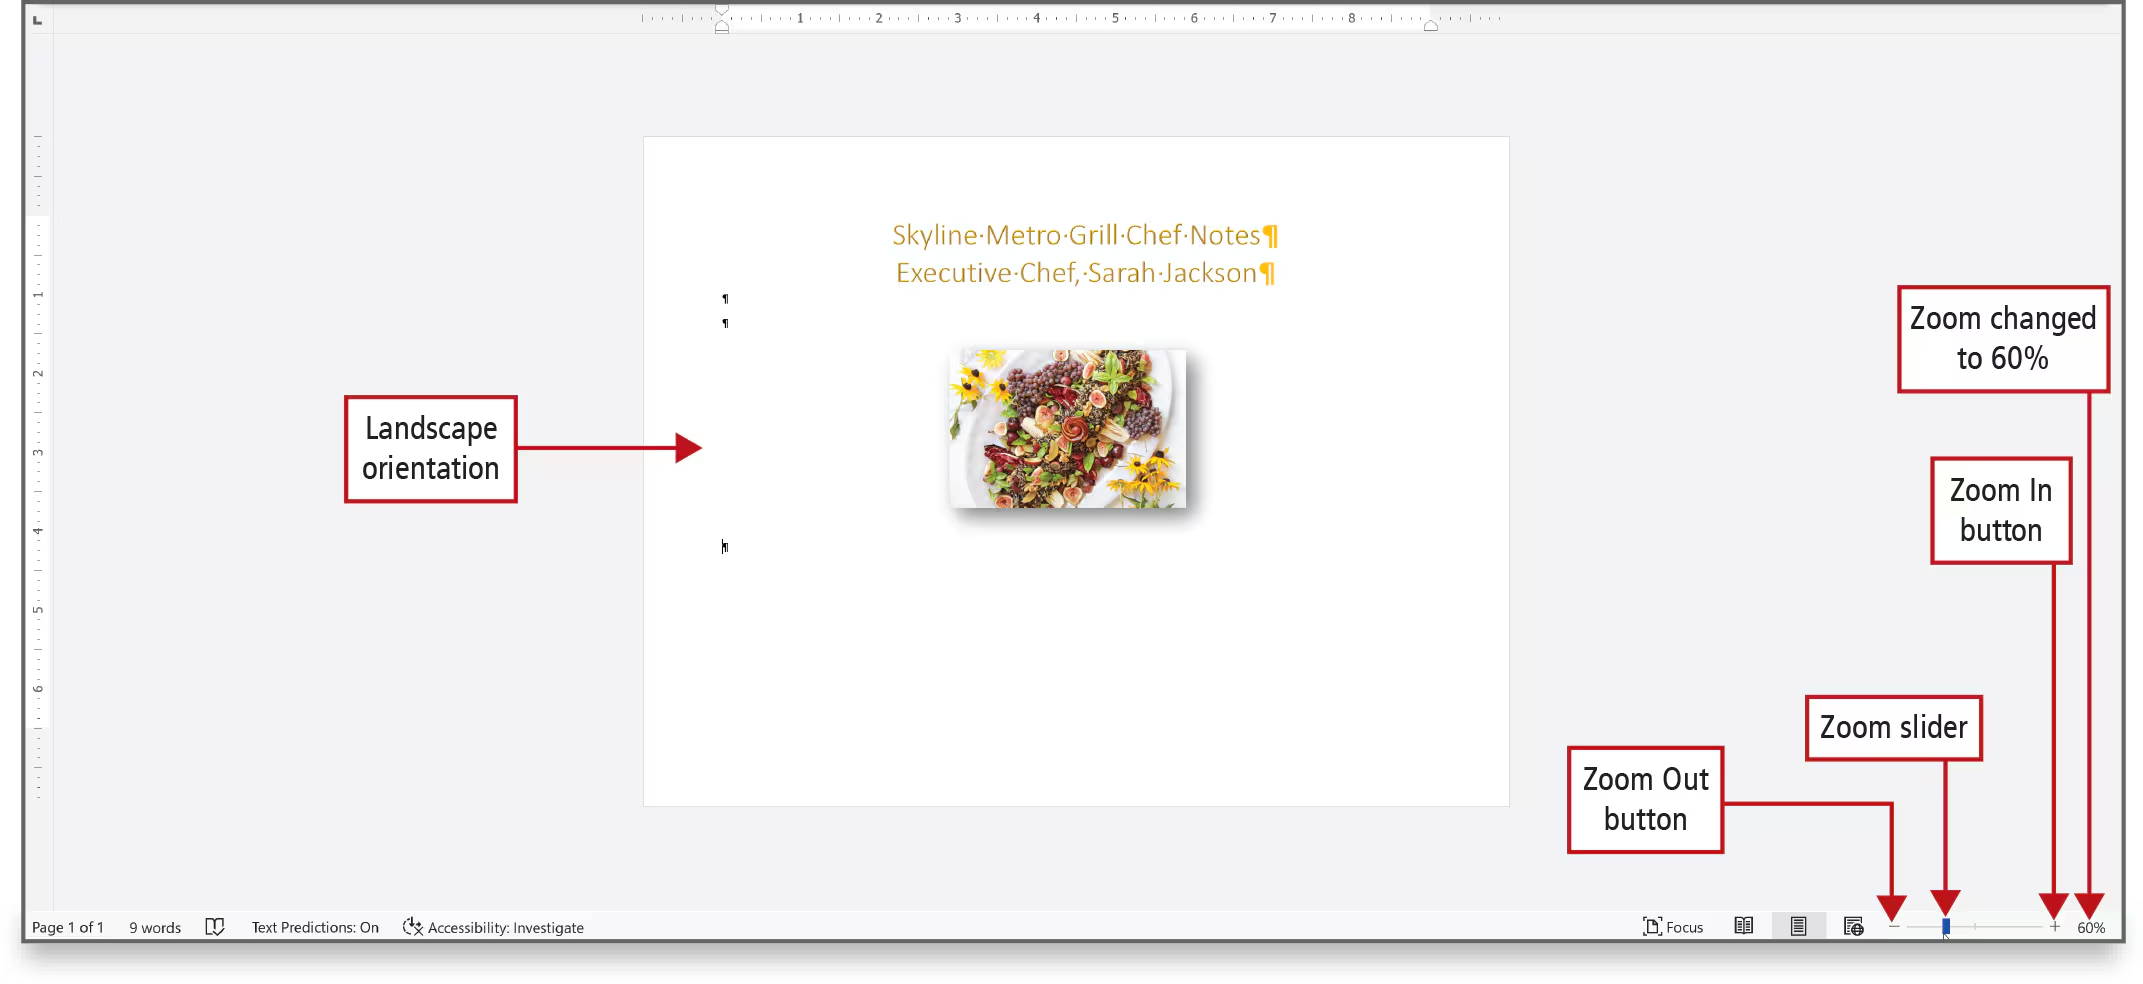
- On the ribbon, click the Layout tab. In the Page Setup group, click Orientation, and notice that two orientations display—Portrait and Landscape. Click Landscape.
- In portrait orientation, the paper is taller than it is wide. In landscape orientation, the paper is wider than it is tall.
- In the lower right corner of the screen, locate the Zoom slider
- To zoom means to increase or decrease the viewing area on your screen. You can zoom in to look closely at a section of a document, and then zoom out to see an entire page on the screen. You can also zoom to view multiple pages on the screen.
- Drag the Zoom slider to the left until you have zoomed to approximately 60%.
Formatting Text by Using Fonts, Alignment, Font Colors, and Font Styles
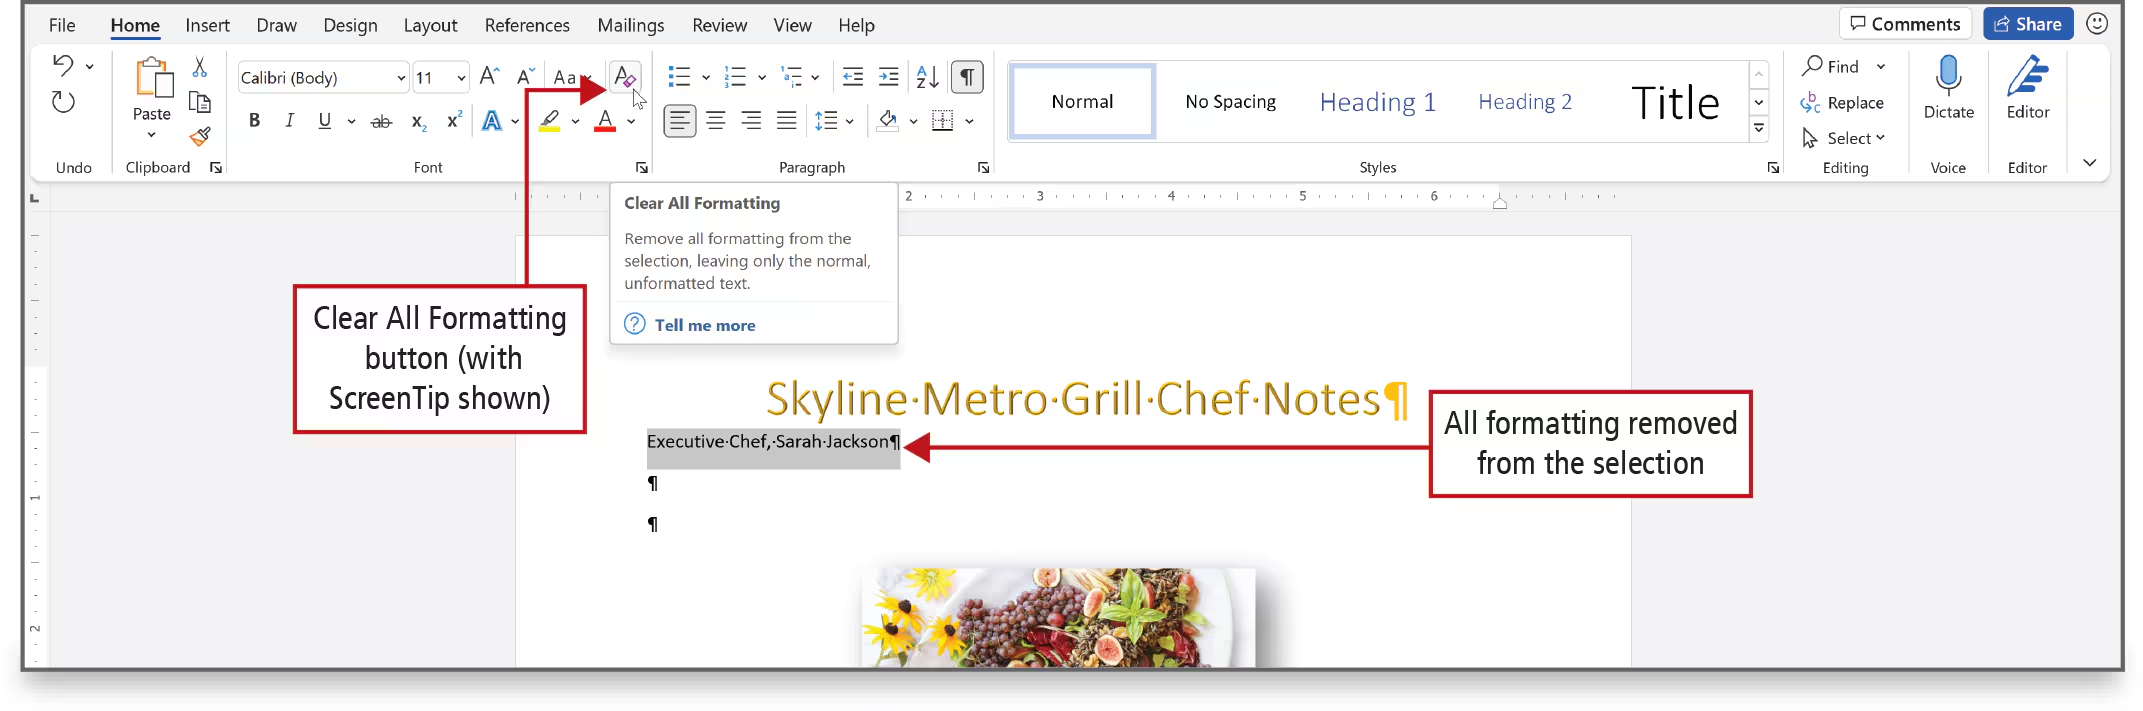
- Clear All Formatting : This command removes all formatting from the selection, leaving only the normal, unformatted text.
- From the Home tab or the mini toolbar you can style :
- alignment
- font
- A font is a set of characters with the same design and shape. The default font in a Word document is Calibri, which is a sans serif font—a font design with no lines or extensions on the ends of characters.
- The Cambria font is a serif font—a font design that includes small line extensions on the ends of the letters to guide the eye in reading from left to right.
- font size
- Fonts are measured in points, with one point equal to 1/72 of an inch. A higher point size indicates a larger font size. Headings and titles are often formatted by using a larger font size. The word point is abbreviated as pt.
- Font color
- Bold
- Italic
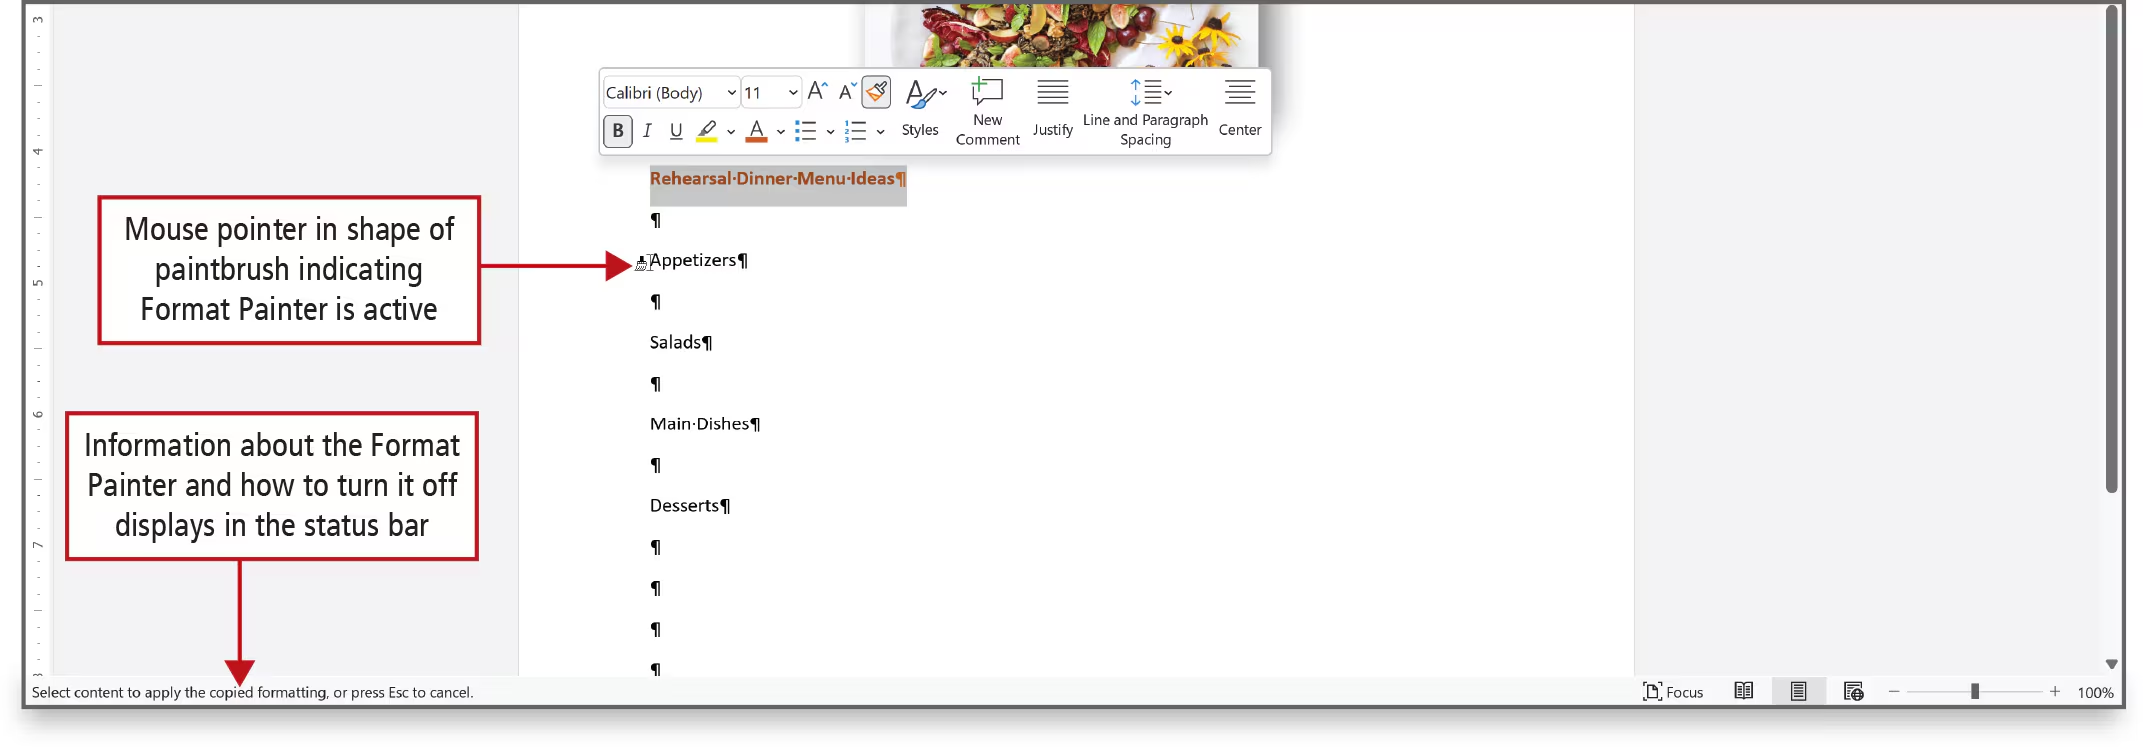
Reproduce using format Painter
The paintbrush tool : on click to use once, double click to use it multiple times
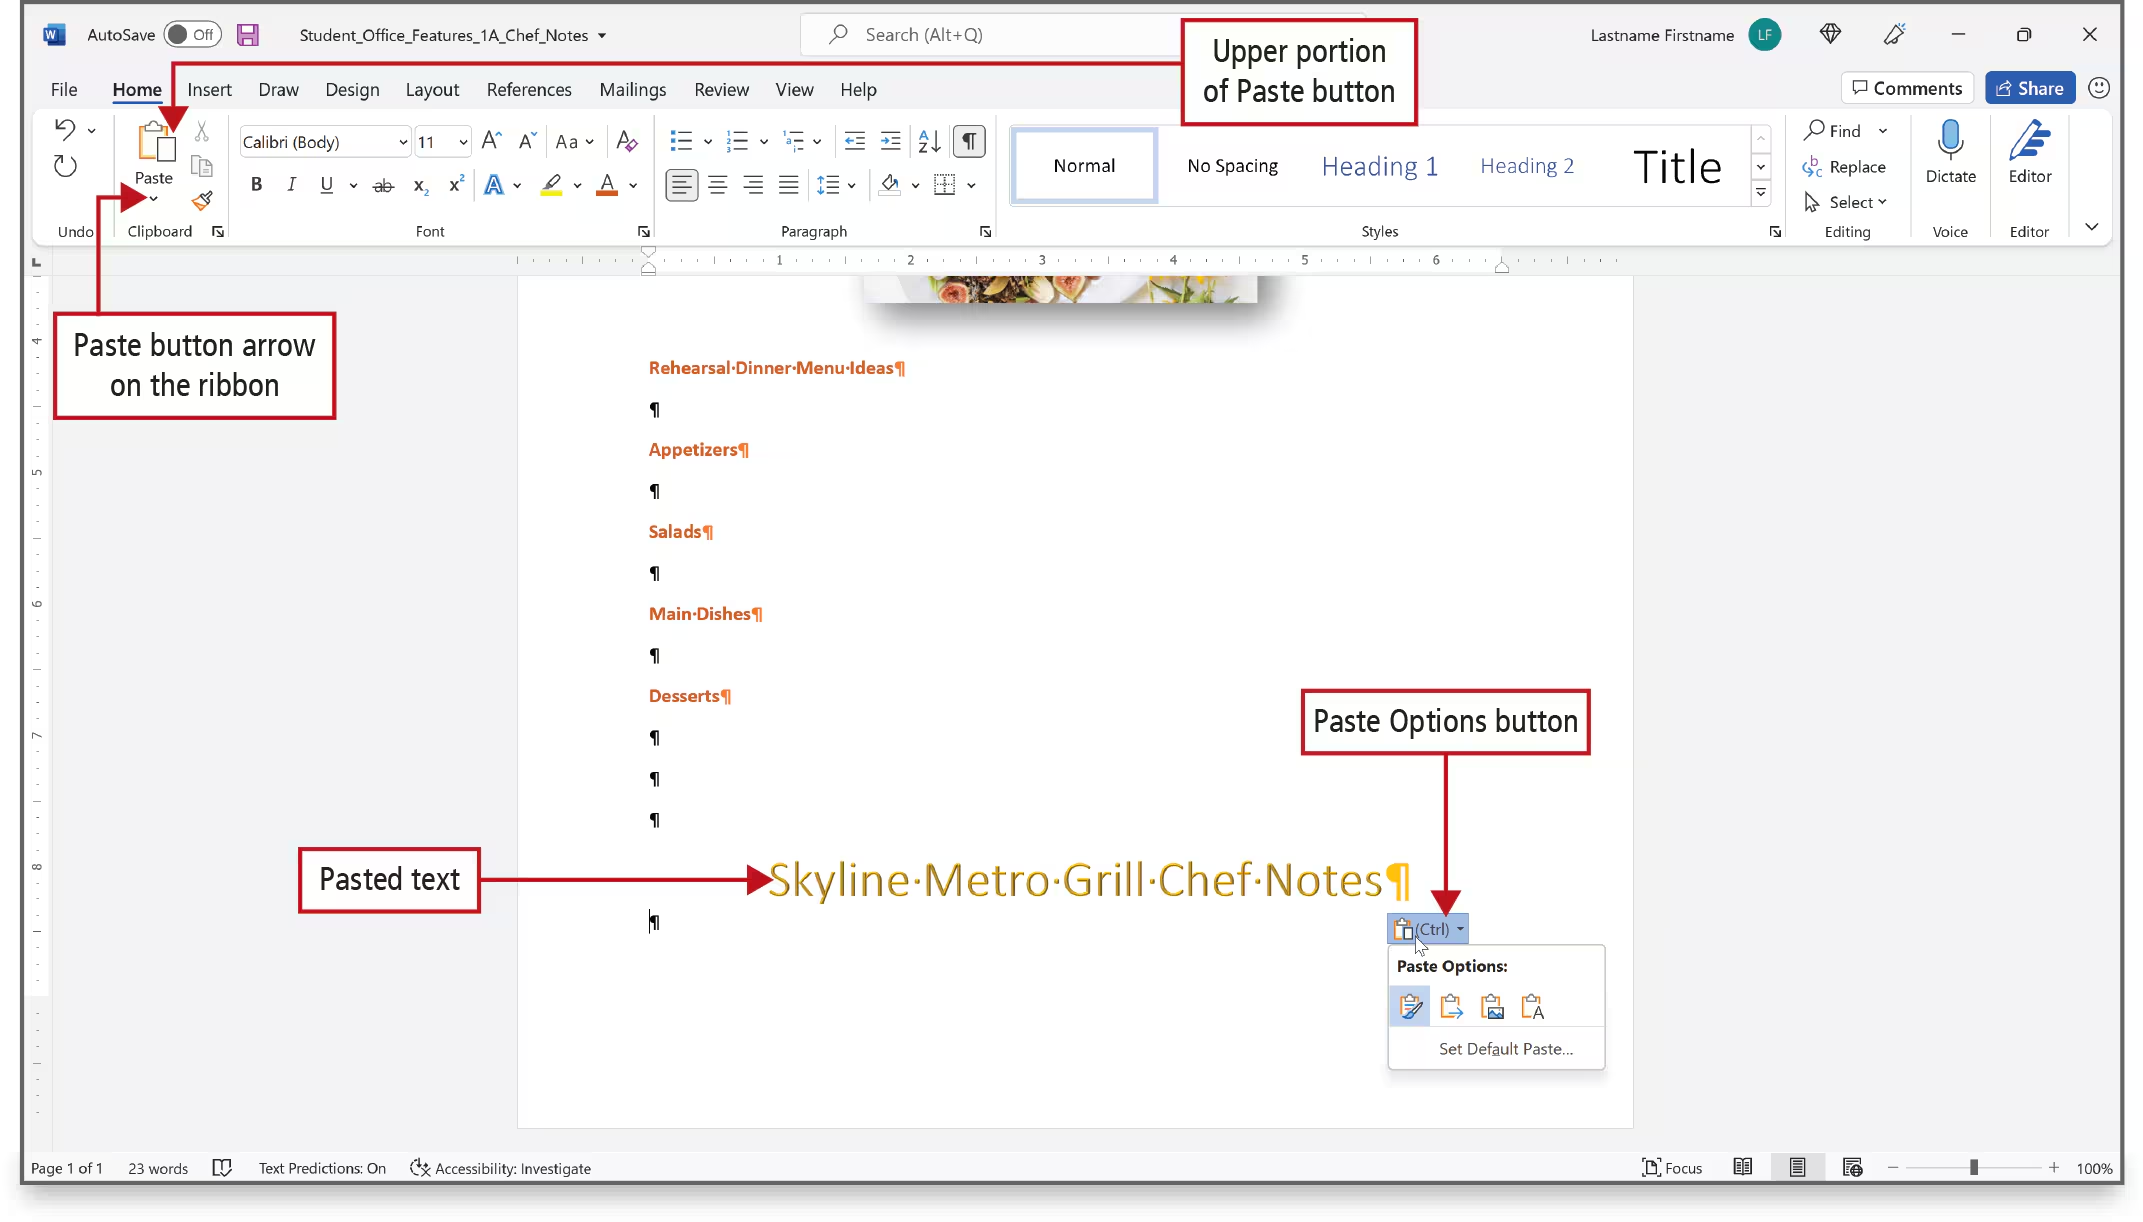
Paste options
Alternative Text for Accessibility
- Click to select the salad picture. Click the Review tab, and then in the Accessibility group, click the Check Accessibility arrow. On the displayed list, click Alt Text to display the Alt Text pane on the right.
- Alternative text helps people using a screen reader, which is software that enables visually impaired users to read text on a computer screen to understand the content of pictures. Alt text is the term commonly used for this feature.
💚
Agence digitale Parisweb.art
Tout savoir sur Julie, notre directrice de projets digitaux : https://www.linkedin.com/in/juliechaumard/